Brazing pipes and boiler repairs on espresso machines
Table of Contents
Brazing Overview
There will be a time and place where a current project on the bench will require boiler repairs or new pipes for various reasons. Brazing is a very useful technique to save these parts or manufacture replacements. There are a variety of solders and torches available, but to ensure the repair or replacement has the highest chance for success, silver soldering is the best for espresso machines.
Brazing is a form of soldering, but at a much higher temperature than traditional tin/lead solder. It is a process of joining metals in which molten filler is drawn into or retained in the space between closely adjacent surfaces of the metal parts by capillary action. The general benchmark where soft soldering becomes brazing is 450°C/840°F. The technique requires practice, but in exchange the assembled metal pieces will be connected with a much higher quality due to the materials used as filler in the joint.
Silver solder has advantages to soft solder when applied to espresso machines. The joints made using silver solder is much stronger than soft solder, which will be able to endure the hot temperatures of the boiler and will endure the heat/cool cycles when turning the machine on or off. Most importantly, silver solder contains no lead, which if present may leech into the boiler over time.
Pipes
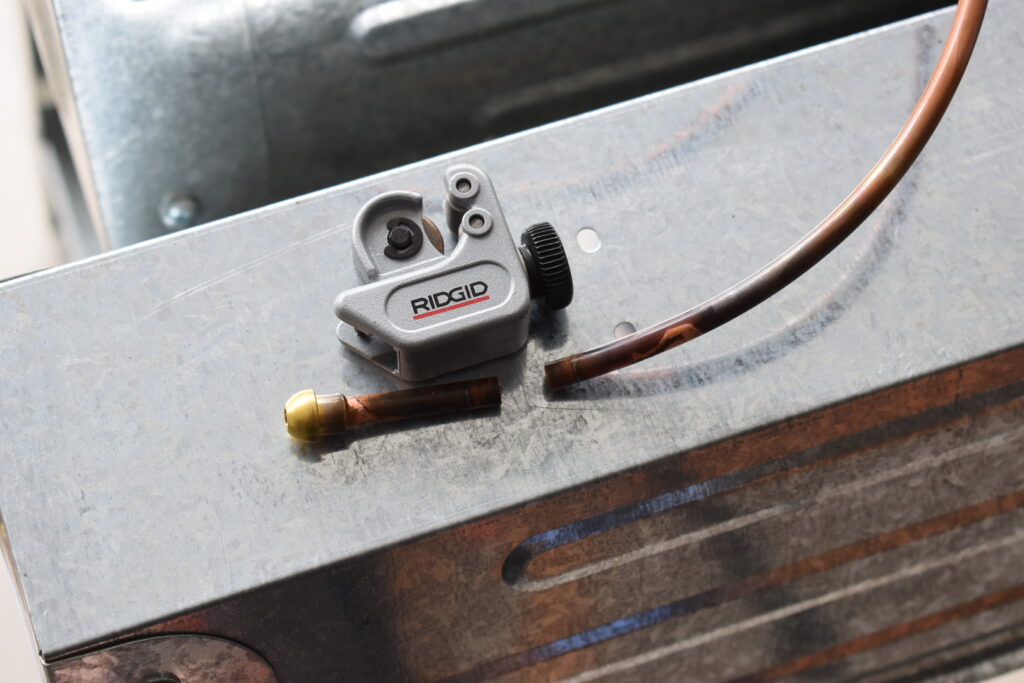
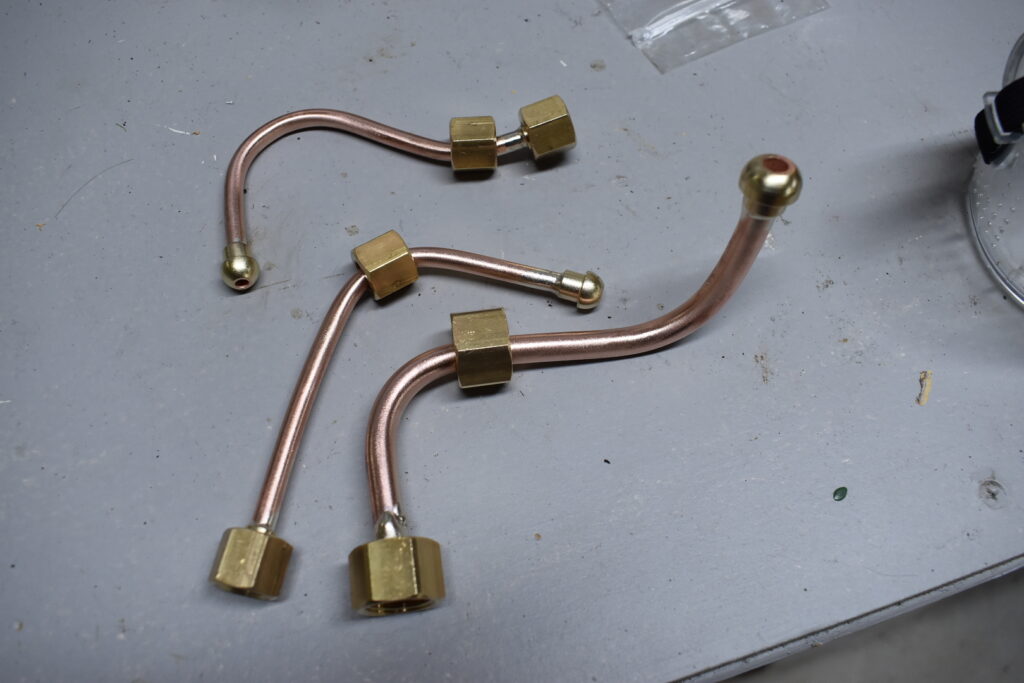
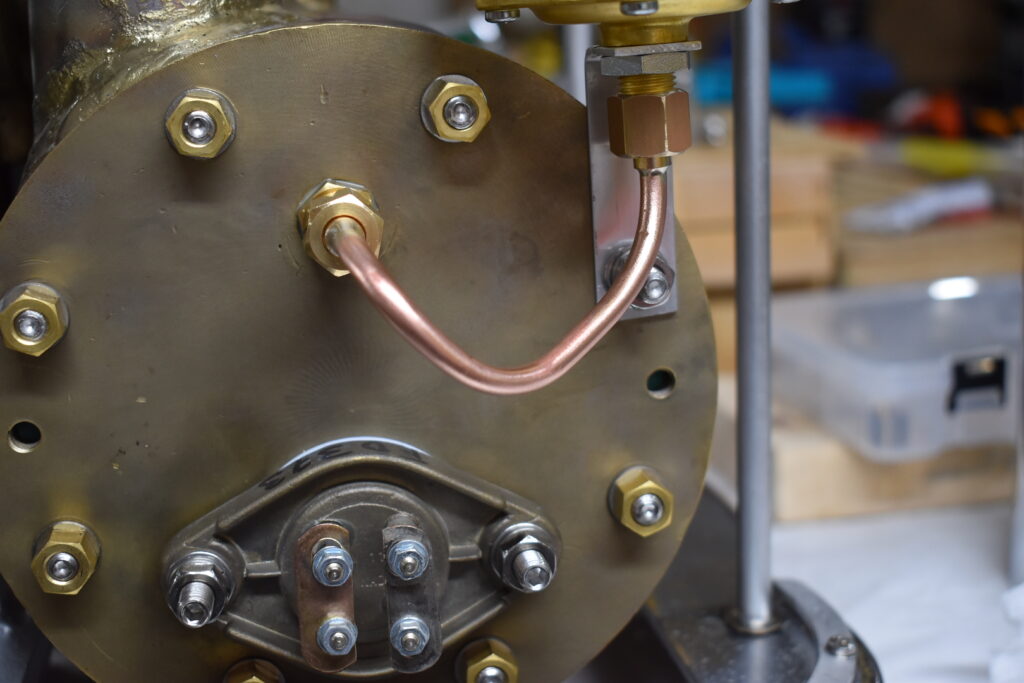
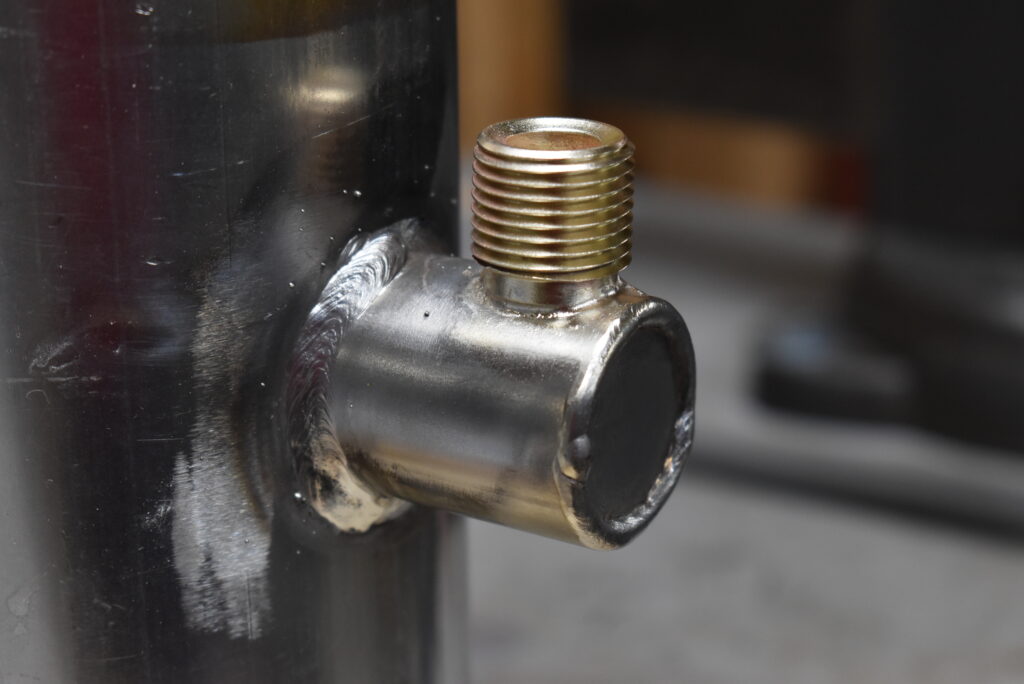
Espresso machines utilize copper pipes with brass compression fittings to achieve a gasket free seal via metal to metal contact to connect the boiler to the various valves and groupheads. Without these pipes, the water and steam in the boiler cannot be used. Sometimes, a pipe is too worn to be reused in a restoration project and needs to be remade. New pipes may also be necessary if a new connection is required, such as installing a pressurestat for the first time.
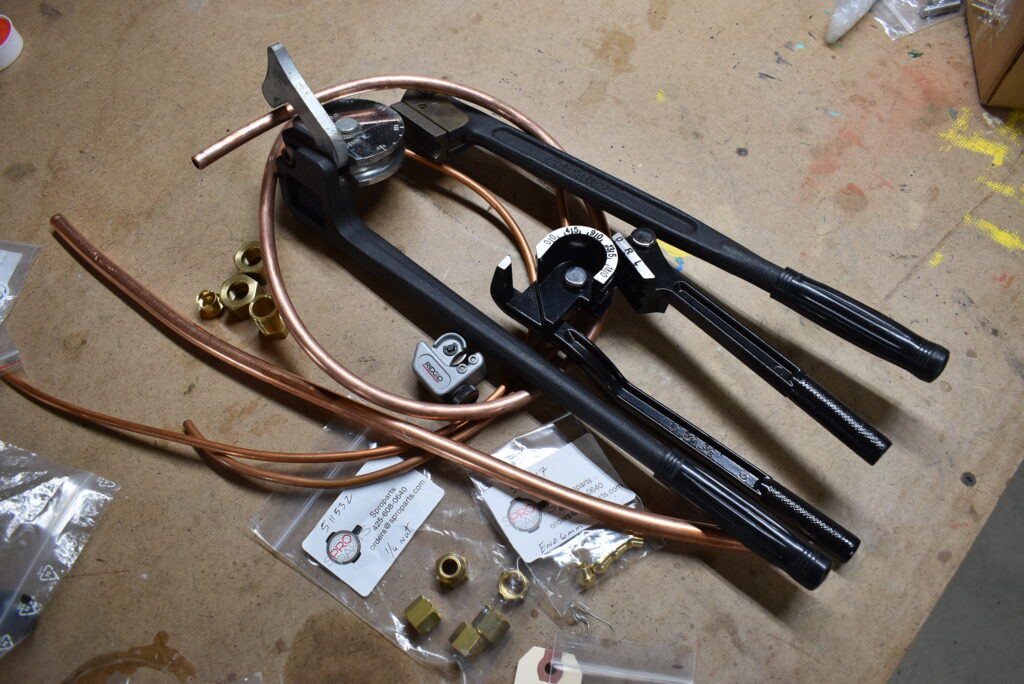
There are multiple diameters of copper tubing used that corresponds to fitting sizes. The most common OD of pipe ranges from 4mm to 12mm. The nuts that compress the brass compression nipples often can be used with two sizes of pipe.

The most common pipes that will be made will be 1/4″ BSP fittings with 6mm OD pipe and 3/8″ BSP fittings with 8mm OD pipe. The former is used for pstat pipes and valves, and the latter is used for valves and sight glass fittings. Occasionally, larger 1/2″ BSP fittings and 12mm OD pipe are necessary, but they are a little more difficult to manipulate due to the specific tools needed to bend the large pipe.
Nuova ricambi is a great source for the pipe and fittings, and they have a good visual catalog to ensure the correct ones are selected for the job. The US distributor is Sproparts in Washington State, which you can create an account to access the parts.
Brazing Basics
The tools and materials needed for brazing are not too many, but each one is important and will be reviewed here. They are the following:
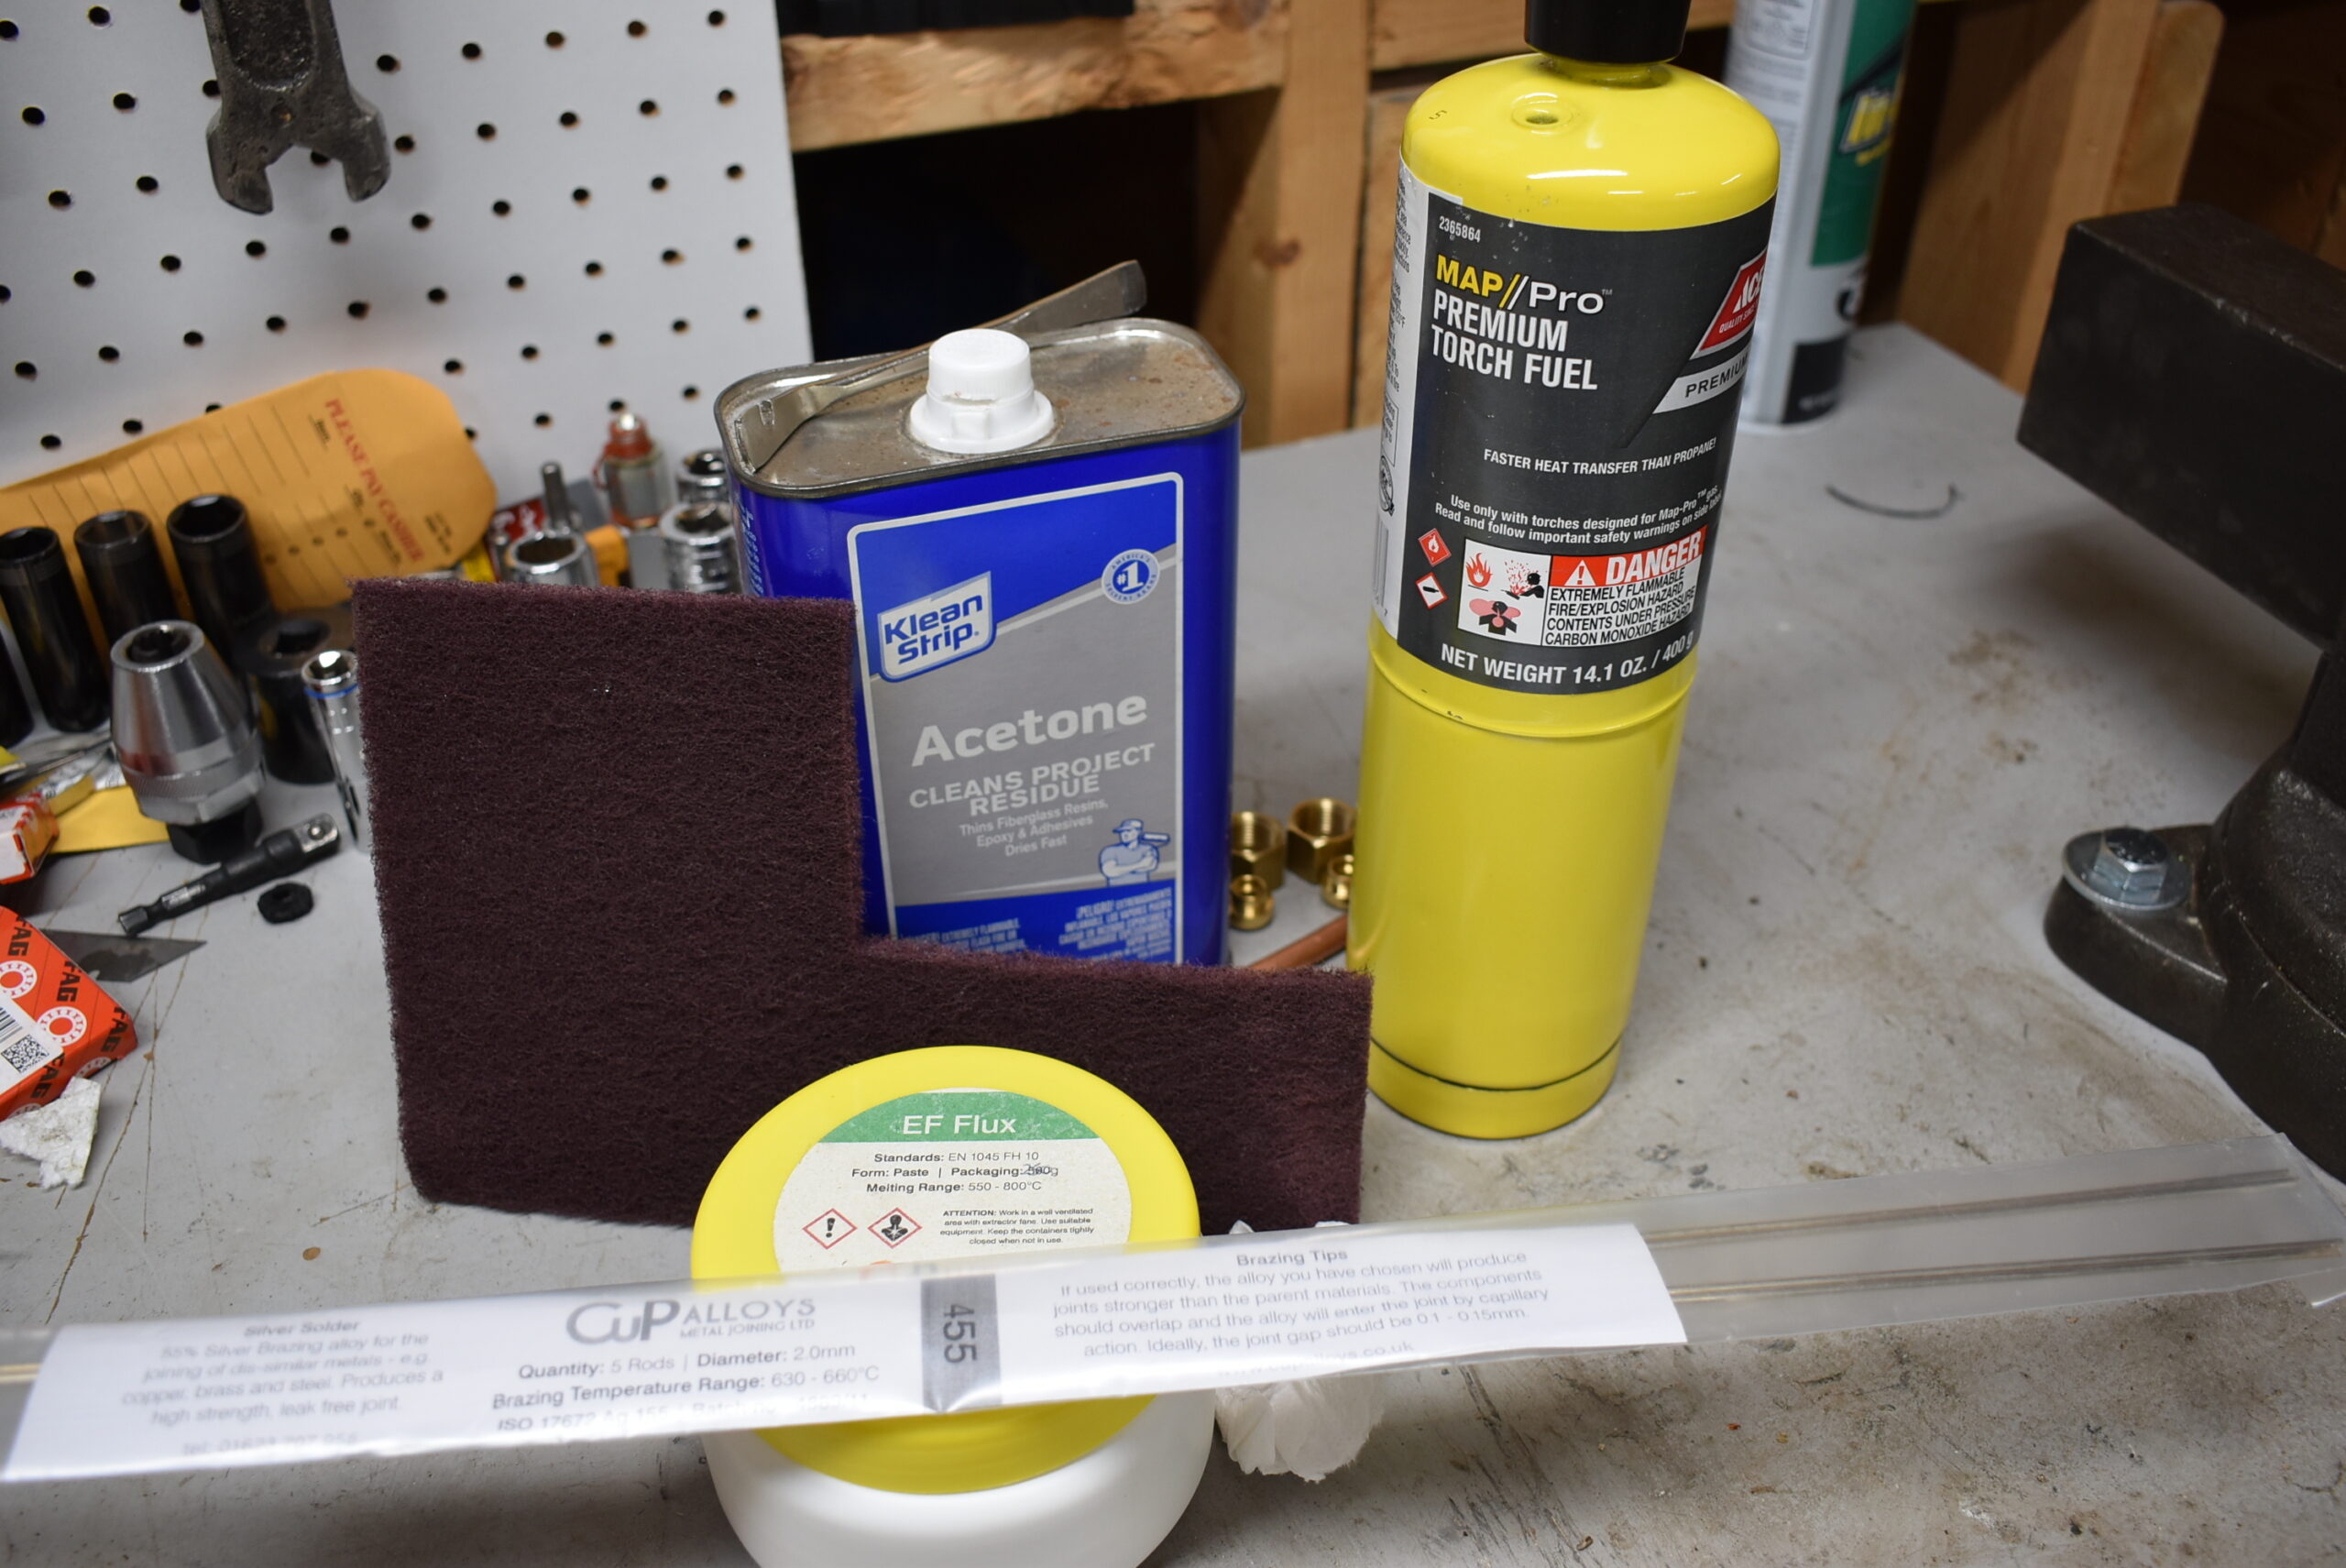
- Silver Solder: The filler used to join metal parts. A good source is Cupalloys in the UK. I personally use their 455 silver solder 2mm diameter rods, which is large enough to quickly fill joints.
- Flux: flux is necessary to allow the solder to adhere to the metal surfaces by cleaning metal during heating, and drawing the solder where the flux applied. Once again Cupalloys is a good source. Use ther EF Flux for copper/brass, and HT5 if one of the metals to be joined is Stainless Steel.
- Scotch Brite/Scouring Pad: used to prep the surface area of pipes to be brazed.
- Acetone: Cleans the surfaces where brazing will occur. Also used after using the Scotch Brite pad to clean off leftover particles
- Torch and fuel: To provide the needed heat, a heat source is needed. I use a Bernzomatic TS8000 torch and MAP Pro gas canisters.
- Verniculate board: An insulator that can handle high heat during the brazing process. Work pieces can be placed on it without fire risk.
- Vise or Clamp: Used to hold work pieces for easier control of the application of solder.

Shaping and Bending Pipe
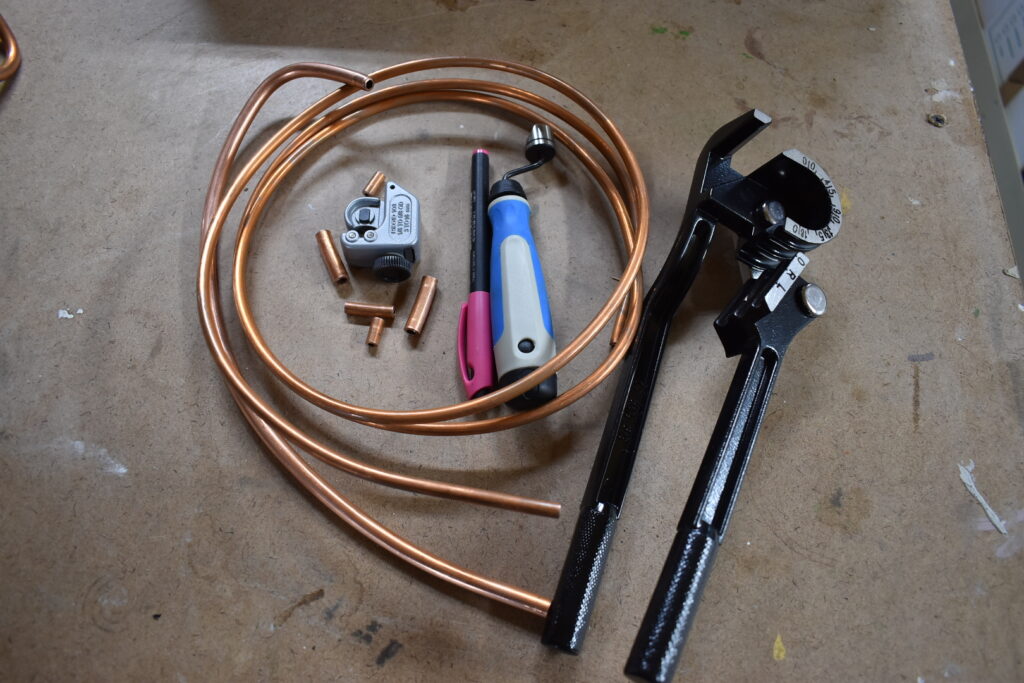
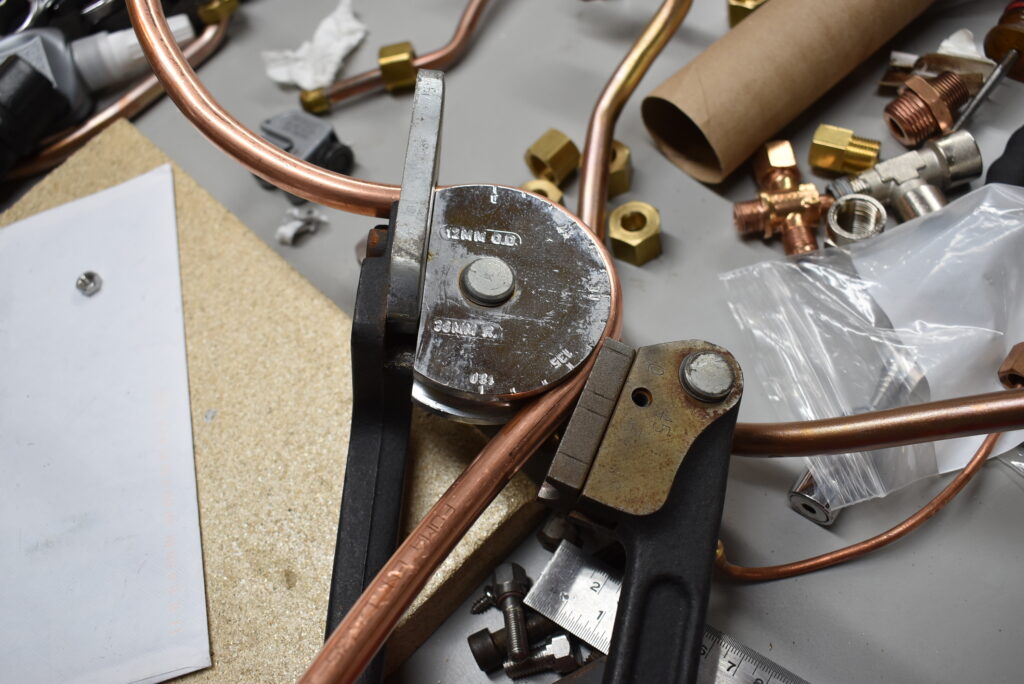
Before the pipes can receive their compression nipples and fittings, the pipes first need to be bent into the desired shape and cut to the correct length. Pipe benders are necessary for bending pipe without kinking, and a pipe cutter is needed to trim excess length.
When purchasing pipe from parts sellers, they are usually sold in meter lengths per cost, which is often much longer than necessary for the specific pipe being made. A small handheld cutter is all that is necessary for all pipe diameters. The pipe bender I use for 8mm and 6mm OD pipe is a cheapie $15 no name brand, and works just fine for soft copper. However, the 12mm OD pipe requires a more specialized bender made by a reputable brand. I personally have a Ridgid 412M bender, but other brands like Swagelok also make professional benders (but are not necessary for copper).
Bending the pipes into shape simply requires practice, but eventually it becomes natural. A marker is useful to mark where to cut the pipe or begin bending with the pipe bender. Once the pipe is cut, a chamfer tool is useful to clear out the burrs that form.
Brazing the Pipe
Once the pipe is formed, the pipe can be prepared for the braze process. A block of heat resistant material like vermiculite is recommended to contain the heat, or you can utilize a clamp or vise to hold the work piece. The ends of each pipe will need to be cleaned of dirt and grime. Scotch brite followed by Acetone is the combo I use for prepping pieces.
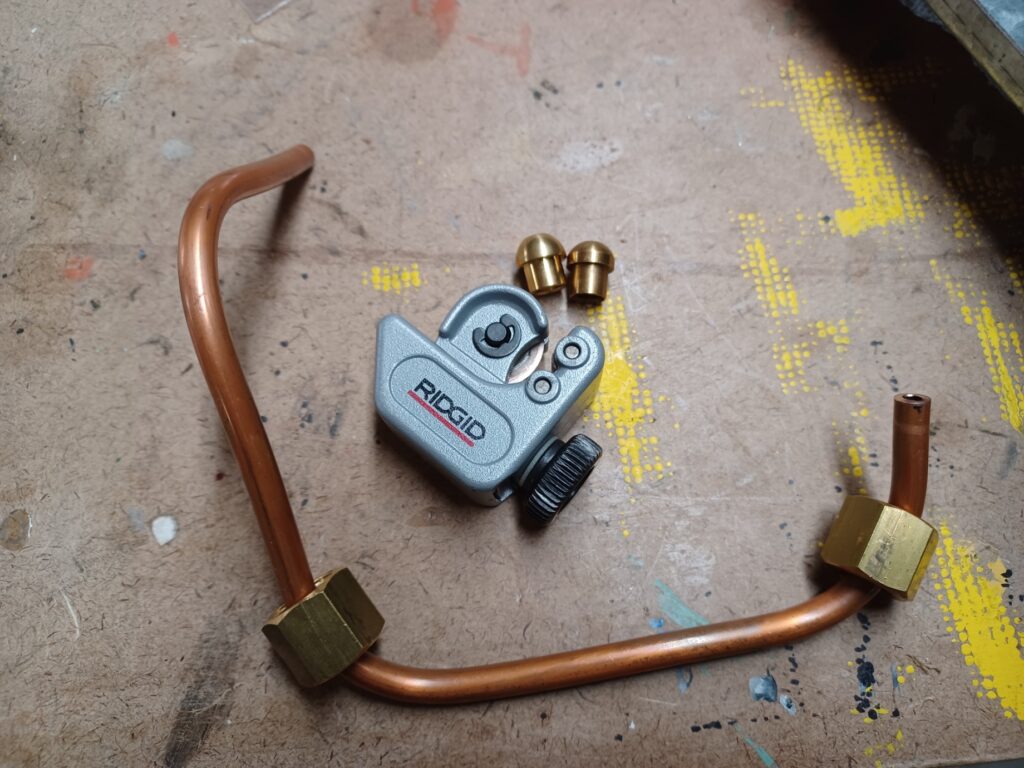
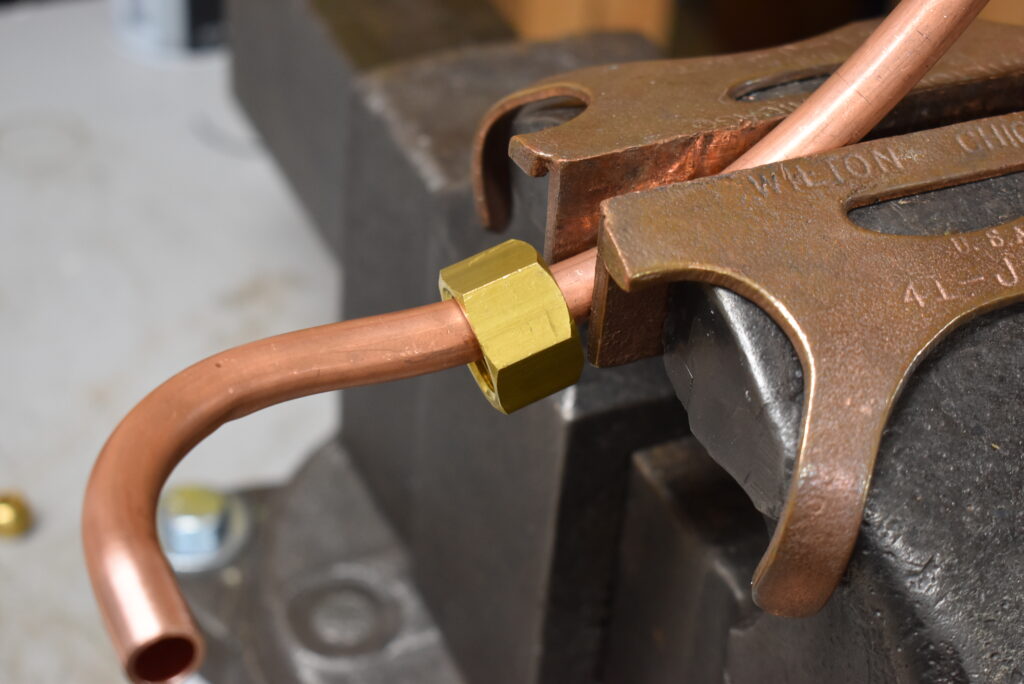
Insert the compression nuts before placing the nipple as the former cannot be inserted once both ends are brazed. Flux is applied either with premade goo, or supplied as a powder than needs to be mixed with a little water to have the consistency of yogurt. The nipple can be inserted, and the braze can commence.
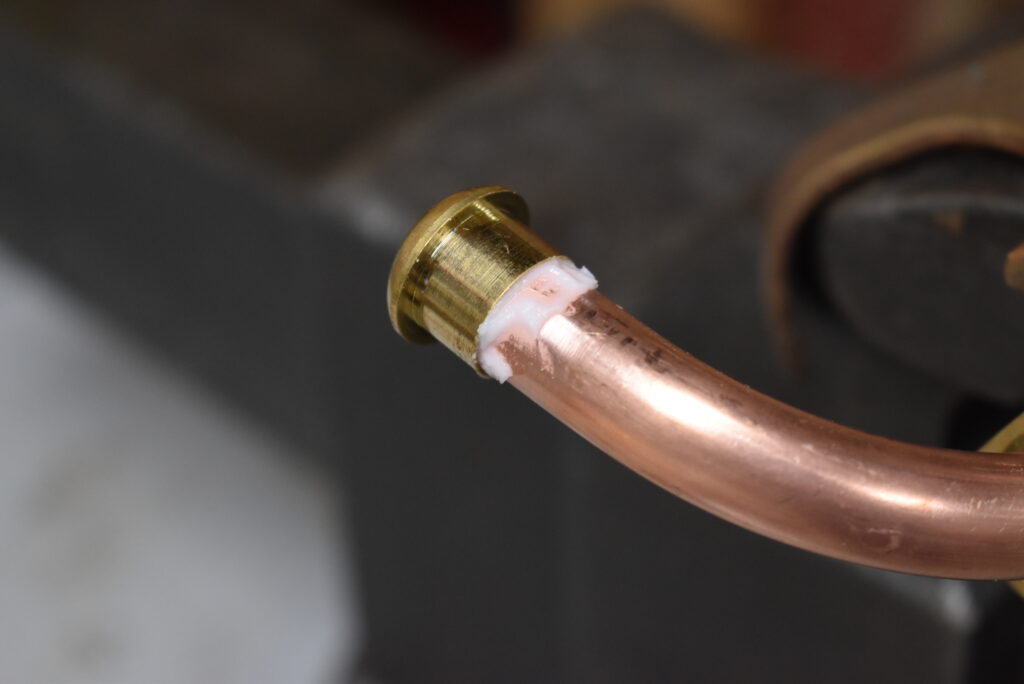
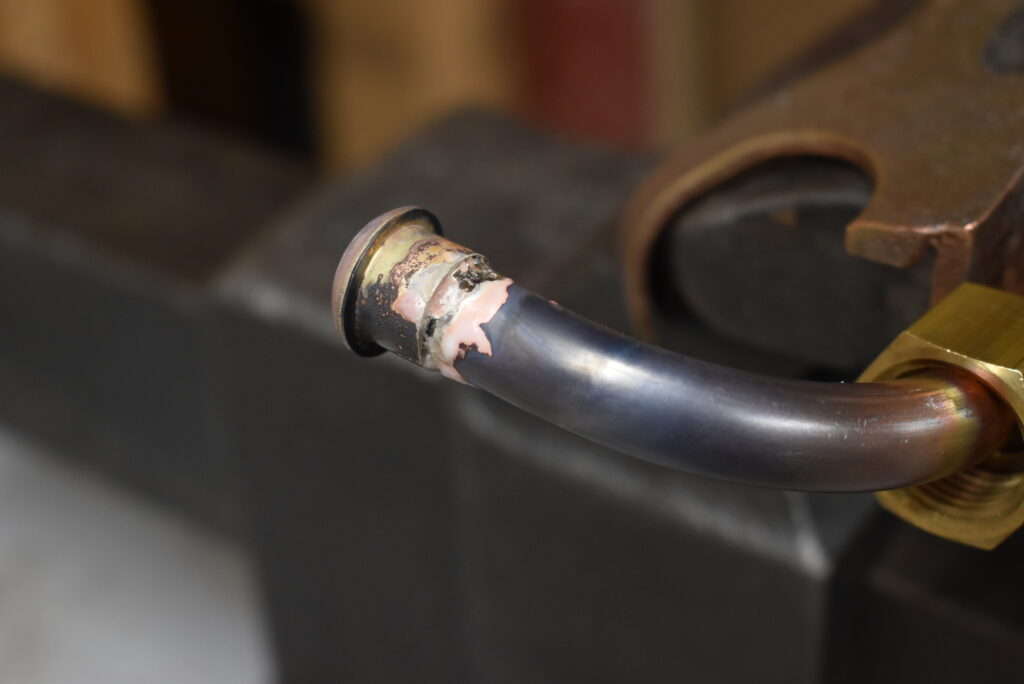
Heating up the fitting takes about 10-20 seconds. The torch needs to be aimed at the nipple itself because solder is drawn into the hottest part of the work piece. The silver solder rod is not supposed to be melted by the flame, but rather by the heated pipe nipple/pipe. When the piece is warm enough, the solder melts and forms a strong bond between the copper pipe and nipple.
Post Treatment
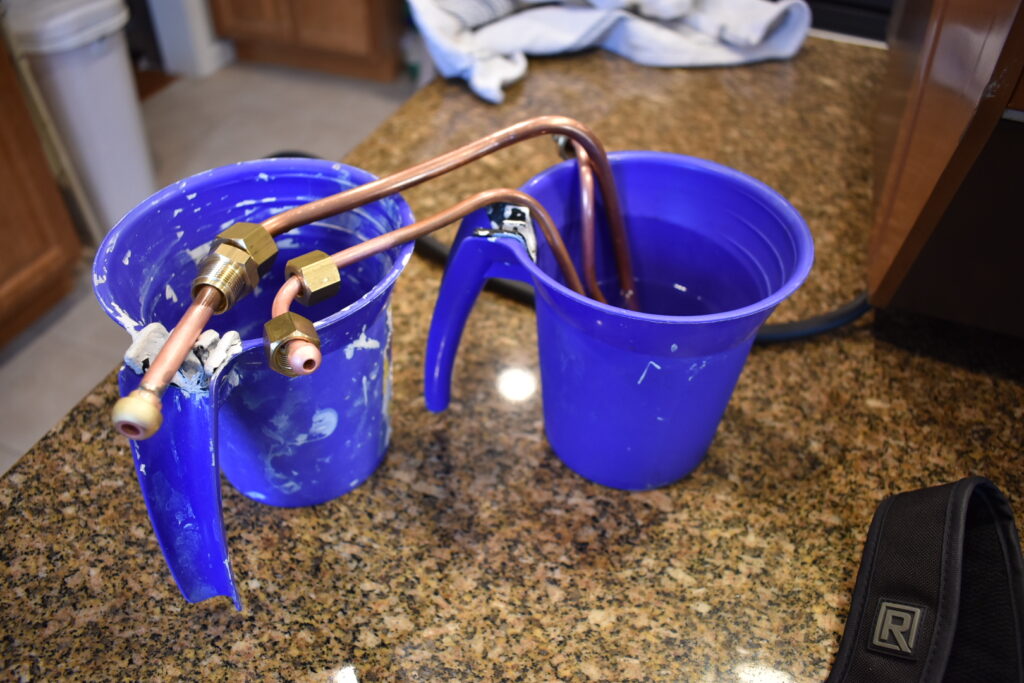
When the pieces are brazed, they first need to cool off. When they can be touched by a bare hand, they are ready to be cleaned. The flux that allows the silver solder to bond with the materials on the work piece will remain after the braze job, and will need to be cleaned off. If left on, it may corrode the material over time. A citric acid bath is the simplest method to clean off the flux, followed by a rinse then wire wheeling. The wire wheel is mostly optional, but will bring the pipe to a nice shiny and uniform surface.
Final Thoughts and Boiler Repair
Sometimes, installing the pipe on the machine may result in some minor adjustment and bending after the brazing process, but a new pipe will seal every time when made correctly. It cannot be understated how powerful it is to be able to produce pipes for all sorts of jobs. Some machines I have restored required no pipes to be made, while two machines required remaking every single pipe to work properly.

Silver Brazing can be done with boilers too, but that requires additional skills and practice that is not recommended to be done by those with no prior experience. I have done two repairs, and each one required a few minutes of heating up the boilers and a lot of solder to fill the voids they needed to fix. When done correctly, brazing can save boilers that were compromised for various reasons.
The first repair I did was on a La Pavoni Eurobar boiler that had a 3 inch crack. I used more solder than necessary, but so far the fix has held after lots of use. The other repair was a La Marzocco GS2 steam boiler that was missing its lower sight glass boiler fitting. A new one was made, and then brazed.

Brazing overall is definitely a skill that should be learned by people repairing both modern and vintage machines just due to its versatility. For a first time project, the investment needed is not too high in costs (with fittings it would cost around $100-$120), and will pair well with first time projects.
Leave a Reply