
List of supplies:
The good thing about making your rust electrolysis set-up is that at its core, all of the necessary parts are quite simple and you you should be able to pull it together using household items. You can, of course, also go all-out and spend a lot of money. Here are the supplies I used to build my tank:
- plastic storage bin – this should be large enough to fit your part with room to spare for the anodes and sturdy enough to be filled with water.
- 3 pieces of 48″ rebar – 3/8″ is easy enough to bend. Important: make sure its not galvanized, or chromed or stainless steel – it must be iron only.
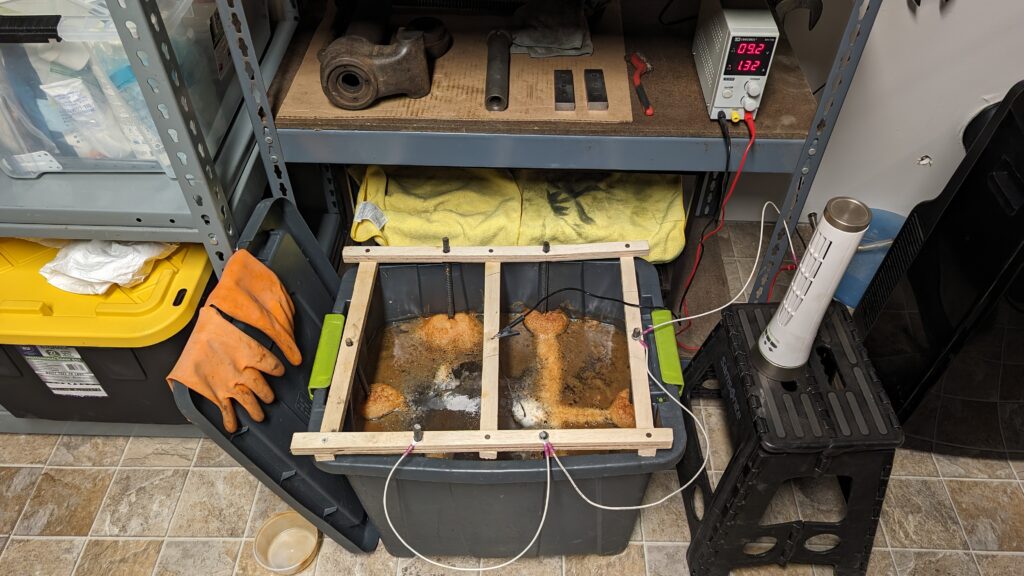
- DC power supply – this is a splurge, but its worth it since it comes in handy for many projects, the fixed current or voltage modes also really help you control reaction
- washing soda – just use this one, not baking soda or Borax
- electrical wire (optional: heat shrink terminals) – to connect the rebar together and attaching the clips from the power supply
- rebar tie-wire – this is just for the cathode (-), to hang your part in the soup
- fish tank dividers – I lay this along the bottom over the rebar. It creates some space for the heaviest pieces that just wont be able to hang from a wire.
- scrap pieces of plywood to frame it up
- Chemical resistant gloves – in case you need to reach into the bath to move parts around.

Setup and important info:
- Frame your rebar along the bottom and edges of your tub – I made a simple grid with 3 pieces as you can see in the photo above. The idea is to surround your part from all sides in order to get the best outcome. The reaction is ‘line-of-sight’ so corners and hidden surfaces may need more time or repositioning.
- Important: sacrificial iron on the anode must be pure clean iron or graphite. Never use other metals like stainless steel, brass, copper, aluminum, lead, etc. This would be a big no-no as it would leach dangerous heavy metals into your solution and create dangerous environmental or health issues. I have heard graphite is less messy, but its more expensive and harder to find.
- Wire up your rebar. I made it a point to keep all wiring out of the water. You can test connectivity with a multimeter if you have one.
- Hang your part with a piece of tie wire from a bar of piece of wood resting over the top of the bin. For heavier parts, rest your piece on the plastic fish tank dividers. You may need to sand a small bit of rust off to ensure a good electrical connection from the wire to the part. Again, test connectivity with a multimeter if you have one.
- Make sure the anodes and cathodes do not touch. The electrolyte solution will complete the circuit and be the medium to transfer the rust off the piece.
- Fill the tub with water, use 1 tablespoon of washing power per gallon of water, thats ~1/4cup for 4 gallons.
- Remember: positive (+) on the sacrificial iron (anode), negative (-) on the part to be de-rusted (cathode). Seriously, don’t reverse this. Double and triple check it, or you will reverse the process turning your part into the sacrificial anode.
- Keep the power supply clips out of the soup. 1) because of you don’t want to make them part of the sacrificial anode, and 2) because the soup gets nasty and you would rather not want to have to clean them.
- Run your tank in a well ventilated area, better yet outside if you can. The process releases hydrogen gas in small quantities, which is flammable.
- I keep the power in the range of 6-12 volts, 1-2amps. This seems to be the consensus on the optimal configuration. Higher current would make the process faster, but risk embrittling the part. Theres no point rushing this.

Leave a Reply